What is the Facebook Pixel and how do you utilize it?
Ever wondered how that T-Shirt you visited on the Myntra website appeared on your Facebook Timeline or Feed? Then you need to know about Facebook Pixel. If you have a website or an app and you want to promote your business then you should know how to use it. So in this blog, I will introduce you to Facebook Pixel and explain to you how to integrate it into your website.
Let's get started
What is Facebook Pixel?
Explanation from here
A piece of code for your website that lets you measure, optimize and build audiences for your advertising campaigns.
- Pixel collects data from your user's actions like clicking "Add to cart", "Add to wishlist" etc. With this data, you can create ads. For example, the pixel has a feature called "Custom Audience" which lets you find people who are likely interested in your product or reach people who are already engaged with your product.
Why do you need this?
The answer is simple - find people who may be interested in your product or bring back those who have already visited your website.
How does it work?
Whenever you visit a website (that uses Facebook pixel), this pixel gets triggered and it records all the events and sends data to Facebook. For example, go to myntra.com and open dev tools -> Network tab -> type Facebook in filter input box. Then click random buttons like "Wishlist", "Add to cart" etc and now you can see pixel record your actions.
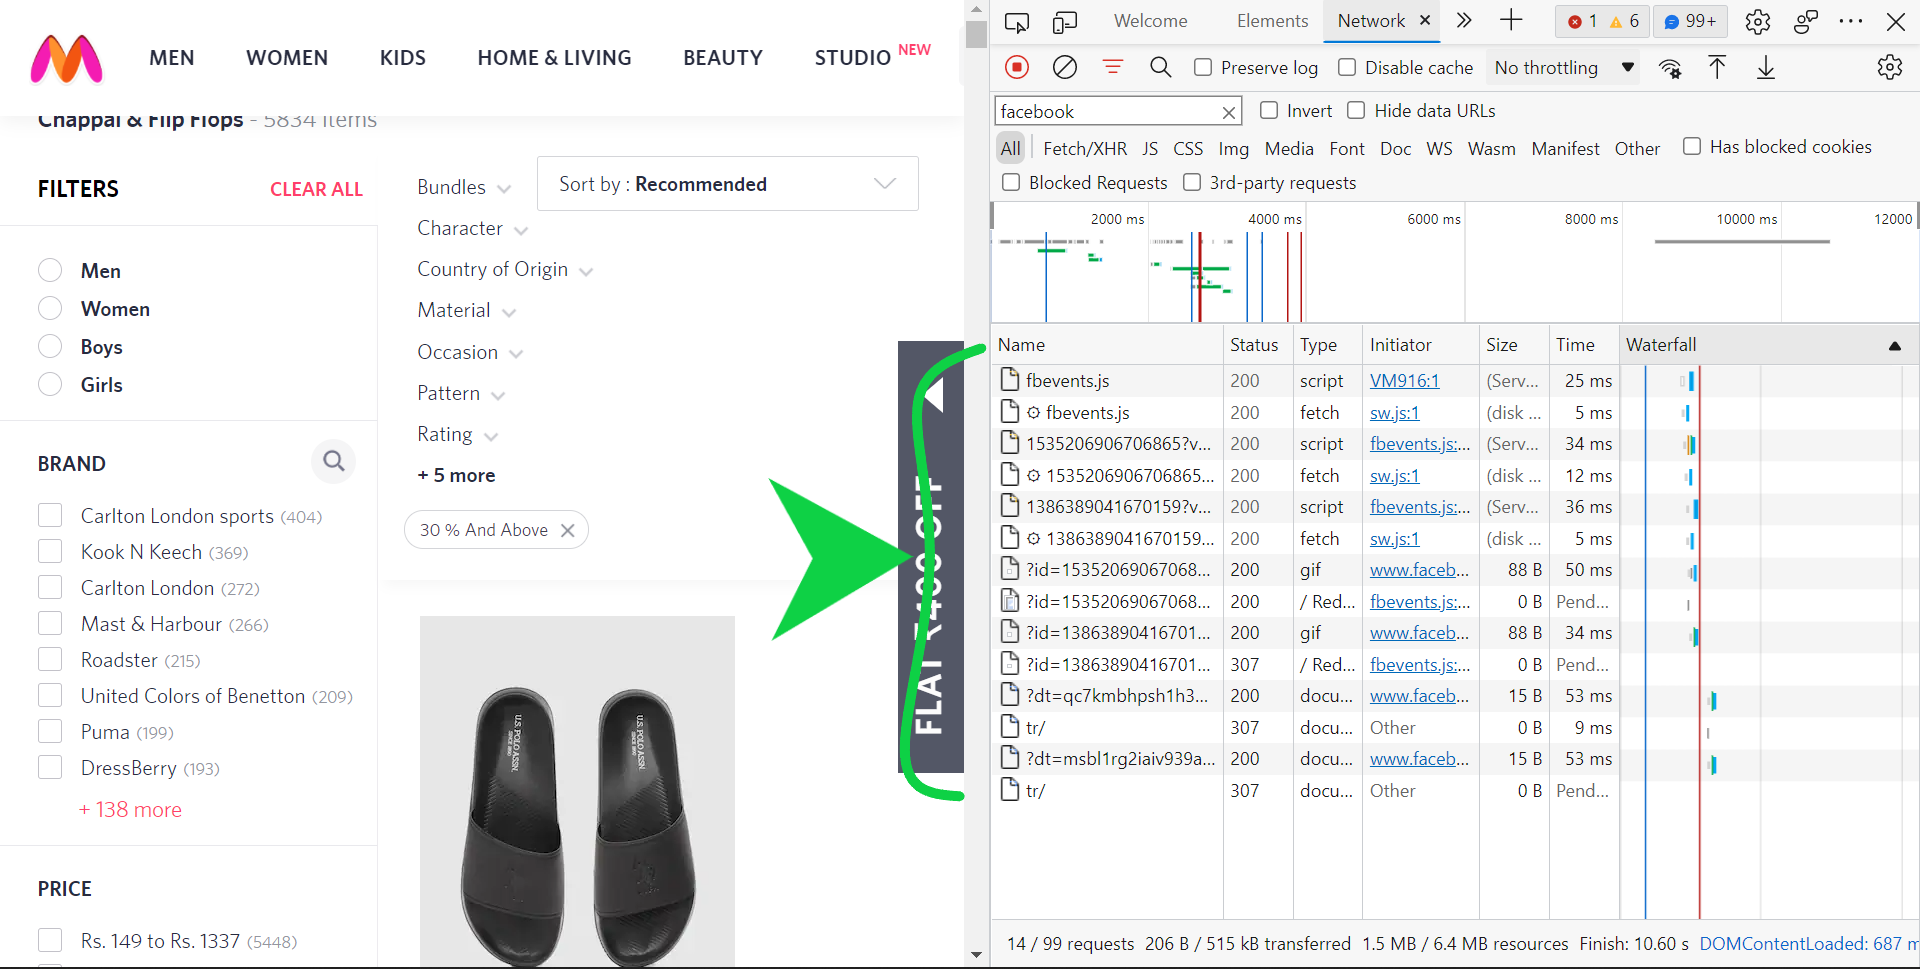
Yes, that looks like a mess. To understand better, Facebook has a chrome extension called Facebook Pixel Helper. Install the extension and visit the Myntra website again. Click the extension and now you can see what events that pixel is tracking.
You may or may not see events because those websites set so many rules like what action to track, where to track, track-only targeted geo locations, etc...
How to integrate Pixel?
Now let's see how you can install the pixel on your website.
Prerequisites
- You need to have access to the source code of your website.
- A Facebook account.
Step - 1:
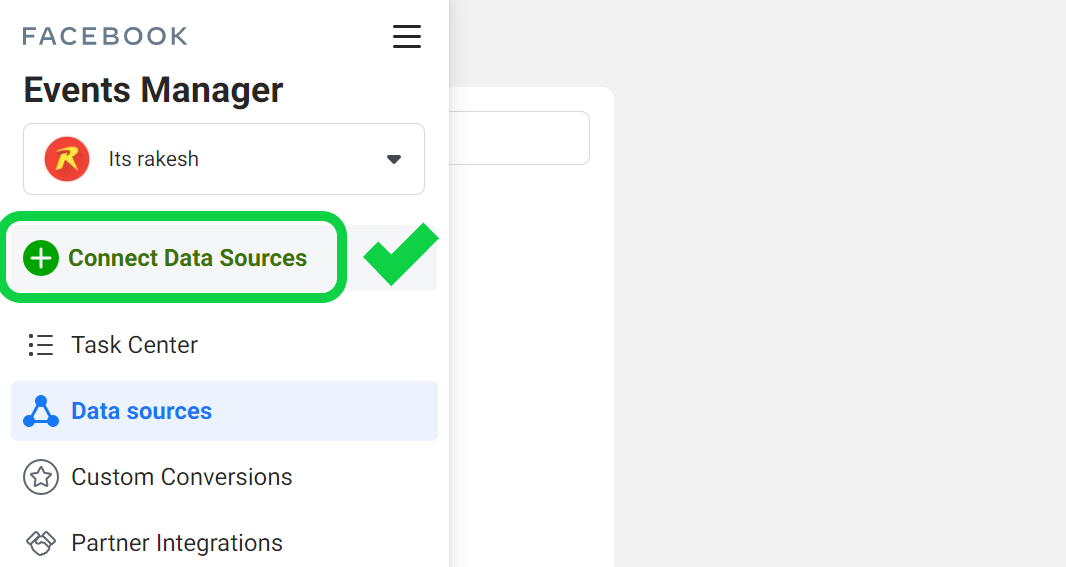
- Go to Facebook Events Manager
- Click Connect Data Sources
- Select Web
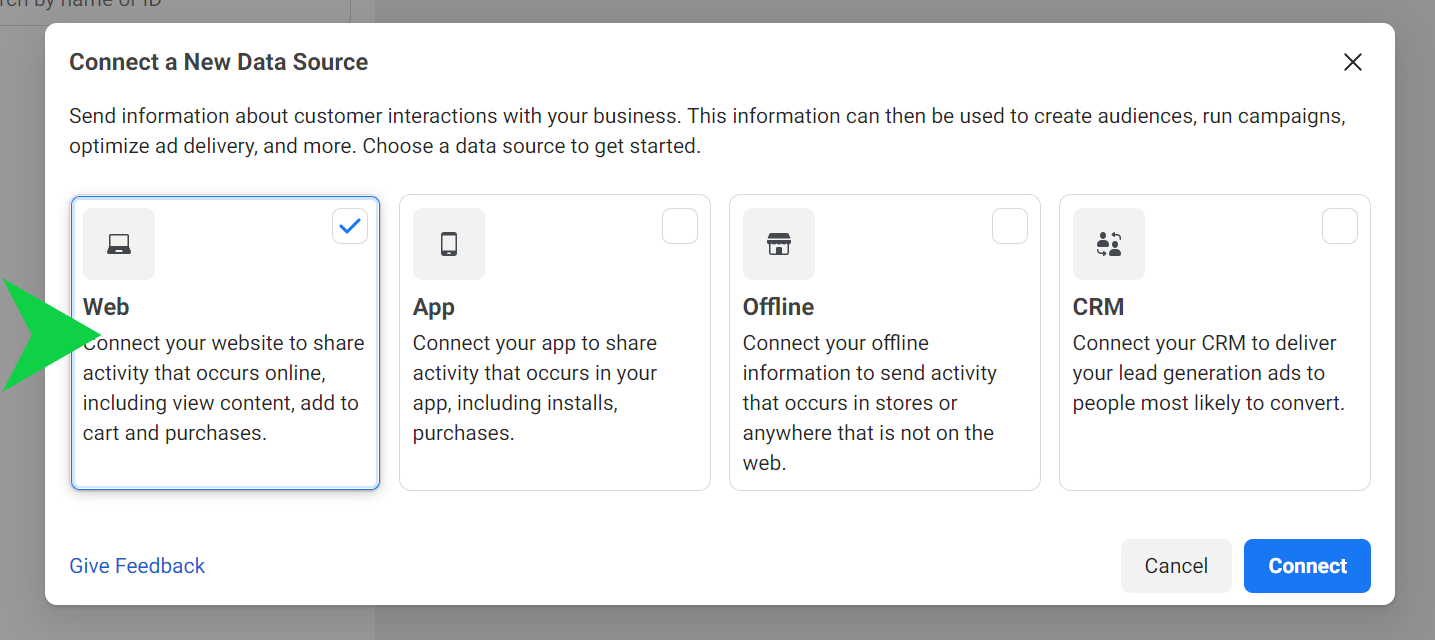
- Create a name for your pixel.
- Follow the steps.
Step - 2: Install pixel
- It's so easy to install the pixel on your website, just choose manual install and copy the code and paste it above the
<head>of your website.
If you are using Shopify or other services you can follow the respective guides.
- After following all the steps to install the pixel, wait for some time, and then your pixel is ready.
- Now you can see your website activity.
Step - 3: Event Setup
- Now you need to do actual thing, that is setup events like clicking a button and tracking a URL.
- To do so, go to Data Sources -> Select pixel -> Settings -> Scroll down -> Click Open Event Setup Tool.
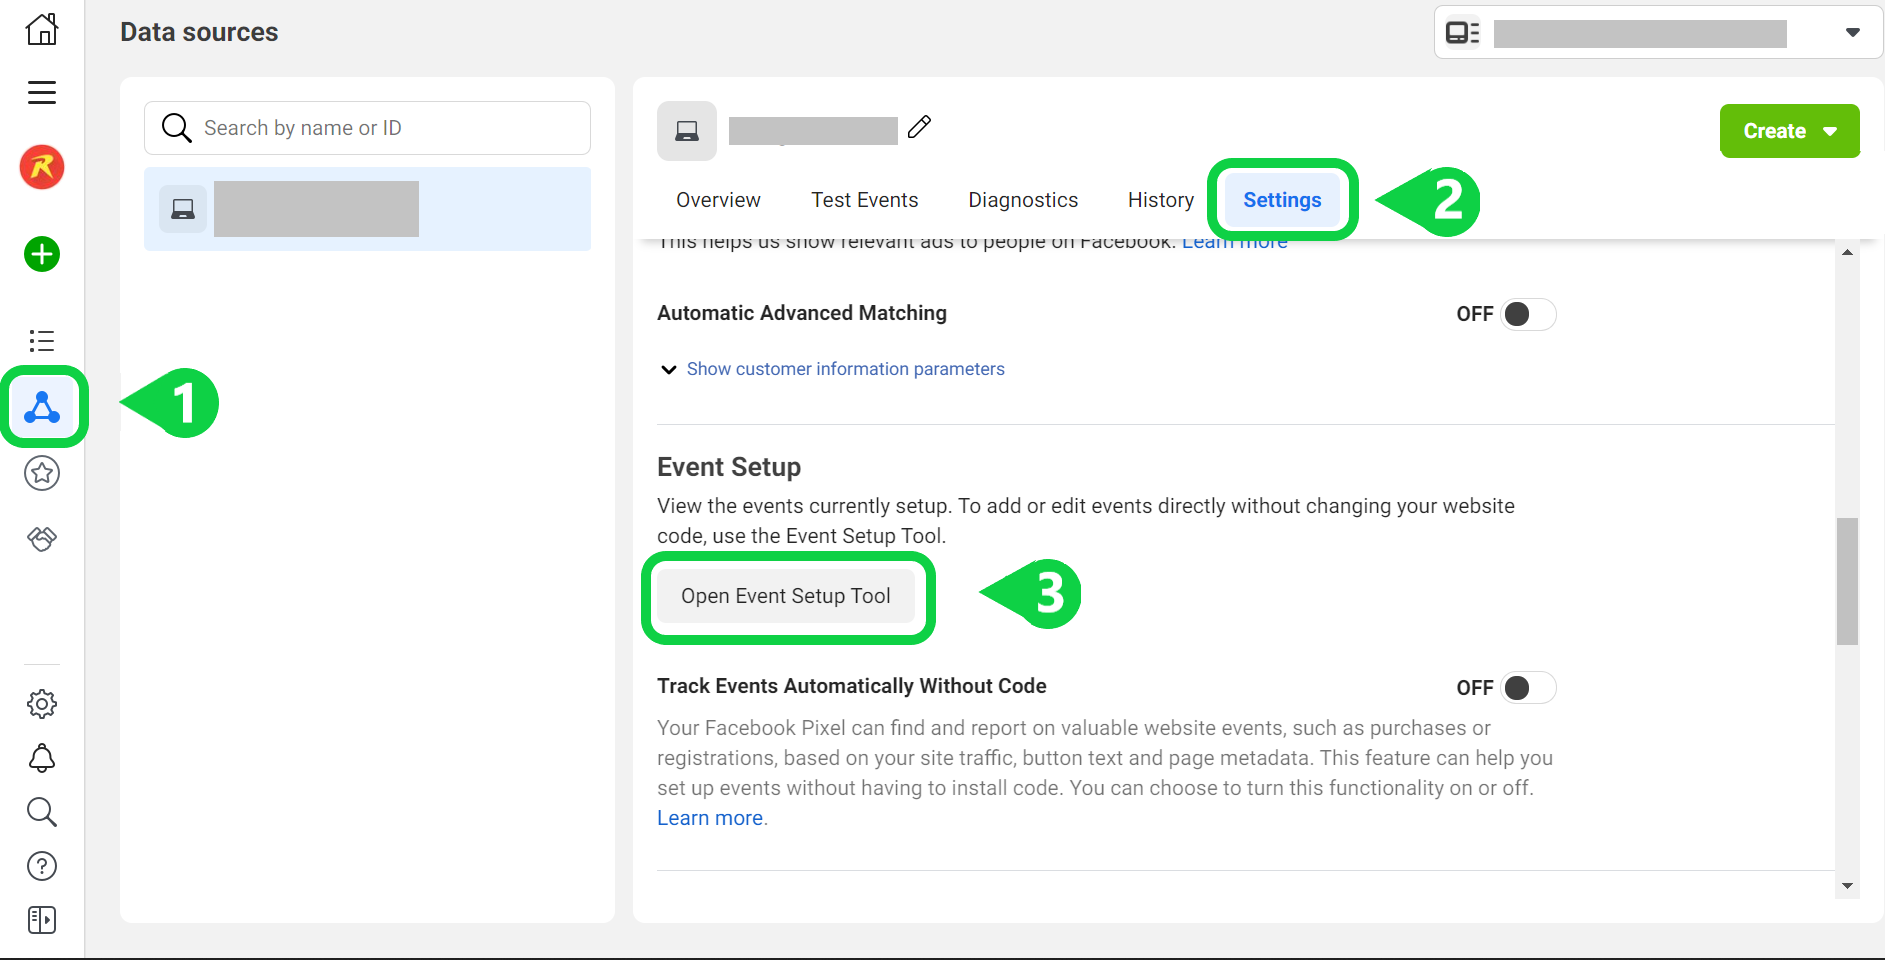
- Enter the website URL and launch the website. Now a window will open along with your website.

- Now can add what events to track like clicking a button, accessing a URL, etc.
- After adding all the events you want Finish Setup.
- That's it! You can test events and see whether they are recording or not with the Facebook pixel helper extension.
Step - 4: Do your research and promotions
- Now that you are tracking actions and knowing about your users. What next?
- Create ads based on your users' interests. For example, create an ad for hoodies if your users are more interested in buying your hoodies.
- Try these-
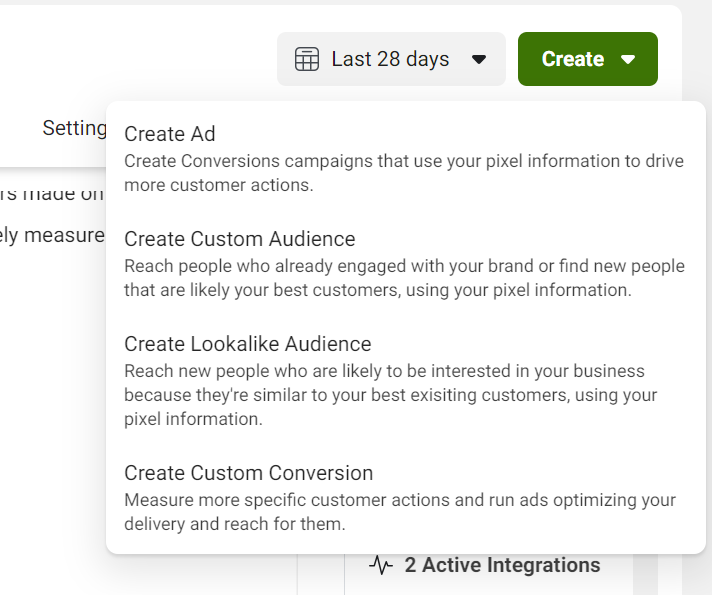
Let me know if you have any doubts or want more articles on this in the comments.
⚒️Tool of the week⚒️
- Monetize your website for free with Coil.
LEAVE A COMMENT OR START A DISCUSSION
MORE ARTICLES
3 min read
Introducing Publish Studio: Power Digital Content Creation
Say “Hi” to Publish Studio, a platform I’ve building for the past few months. If you are a content writer, then you should definitely check it out. And if you are someone who has an audience on multiple blogging platforms and need an easy way to manage your content across platforms, then you should 100% give it a try.

10 min read
Let's Build a Full-Stack App with tRPC and Next.js 14
Are you a typescript nerd looking to up your full-stack game? Then this guide is for you. The traditional way to share types of your API endpoints is to generate schemas and share them with the front end or other servers. However, this can be a time-consuming and inefficient process. What if I tell you there's a better way to do this? What if I tell you, you can just write the endpoints and your frontend automatically gets the types?