Setting up Web Development environment in Windows + linux
In a previous blog, I shared some amazing online playgrounds to quickly start your dev environment. But we all need a local setup at some point. Development with windows is not that great. When working with large projects you have to use Linux for some stuff. For this, we need a virtual machine and a Linux distro. But windows introduced Windows Subsystem for Linux(WSL) so that we can do Linux stuff inside windows. In this blog, let's set up a Web Development environment to build production-level applications.
Let's get started

Frontend
Setting frontend tools like editor, browser, etc.
Setup VSCode
Visual Studio Code is so far the best code editor for Front-end development. So, let's install it from here
Recommended extensions:
Optional extensions:
Browser
Recommended browser for JavaScript debugging - Google Chrome
Recommended browser for design and CSS - Firefox developer edition

This browser is the ultimate weapon for all the design stuff.
Some main features I like in this-
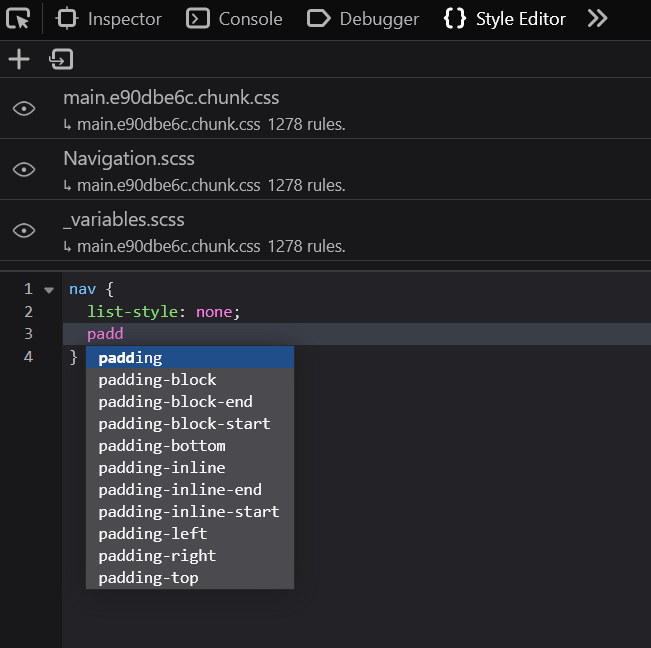
- Style Editor - Firefox made it really easy to test CSS quickly with the style editor. You can write all the CSS for an element in this editor and if you are satisfied just copy and use it in your project. This way you don't need to reload the page every time you make changes to your CSS.
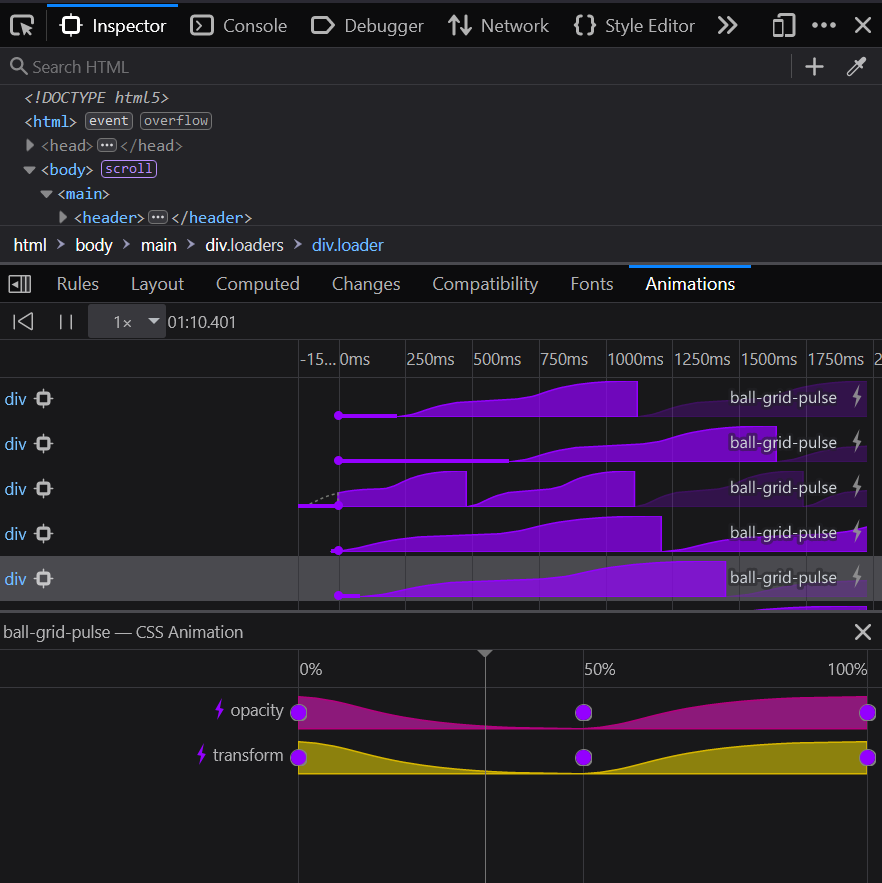
- Visual Editing - Firefox made this tool to help animators and visual designers.
Recommended browser extensions-
Backend
For the backend, VSCode is fine for small projects. But for large projects Jet brains IDEs will be useful.
Setting up WSL2
Windows Subsystem for Linux(WSL) is a feature Windows introduced to do Linux things inside Windows. WSL2 is a faster version of WSL1 with added features. This is not a simulation it's a real Linux kernel inside Windows.
Requirements,
- You must be running Windows 10 version 2004 and higher (Build 19041 and higher) or Windows 11.
To install WSL,
- Make sure your Windows updates are done.
- Open Powershell and run
wsl --install
- Now you have to enable the WSL feature, to do so,
- In the search bar, type "Turn Windows features on or off"
- Search for "Windows Subsystem for Linux" and enable it by checking the box.
- Now restart. That's it we now enabled WSL. Tip: Alternatively you can just run this command.
dism.exe /online /enable-feature /featurename:Microsoft-Windows-Subsystem-Linux /all /norestart
We now need to download a Linux distro to use with WSL. You can install any distro but I recommend Ubuntu because it has special support. To install the Ubuntu distro,
- Open Microsoft store search for "Ubuntu 20.04.4" -> Click "Get" -> Install
Upgrade to WSL2
To upgrade just run this command,
wsl --set-version <distro-name> 2
Replace <distro-name> with your distro. In our case,
wsl --set-version Ubuntu-20.04.4 2
Tip: If you want to go through the Windows file system. You have to mount the directory.
$ cd ~
$ cd /mnt/c
That's it! Now you can do all the cool Linux stuff inside Windows.
Optional
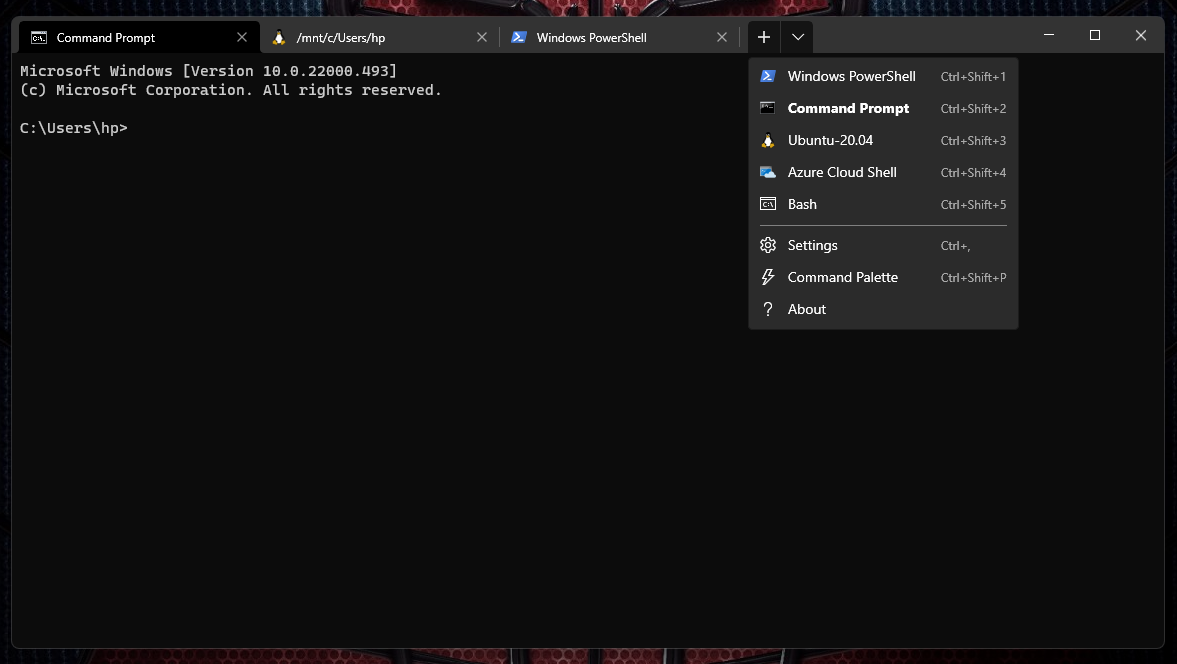
- Windows terminal - With Windows terminal, you can open different instances of different terminals like browser tabs.
- Oh my zsh - If you want to be cooler, then you can use zsh and install this.

- Remote - WSL - This is a VSCode extension to open WSL in integrated terminal.
Docker and docker desktop
Docker is a tool to build, ship, and share software easily. It is widely used in large projects. But it may not make sense for small projects.
That's it! This setup is enough for building full-stack websites.
You may also like these blogs,
What other things do you want to add? Do share in the comments.
Have a nice day!!!
LEAVE A COMMENT OR START A DISCUSSION
MORE ARTICLES

3 min read
Introducing Publish Studio: Power Digital Content Creation
Say “Hi” to Publish Studio, a platform I’ve building for the past few months. If you are a content writer, then you should definitely check it out. And if you are someone who has an audience on multiple blogging platforms and need an easy way to manage your content across platforms, then you should 100% give it a try.

10 min read
Let's Build a Full-Stack App with tRPC and Next.js 14
Are you a typescript nerd looking to up your full-stack game? Then this guide is for you. The traditional way to share types of your API endpoints is to generate schemas and share them with the front end or other servers. However, this can be a time-consuming and inefficient process. What if I tell you there's a better way to do this? What if I tell you, you can just write the endpoints and your frontend automatically gets the types?